Finding 0day for BigAnt
The process of finding a buffer overflow is sometimes tedious, sometimes exciting, and often involves a fair amount of luck. The best way to increase your chances of finding that "needle in a haystack", is to understand how your target application works. What processes does it run on? What inputs does it allow? These are the type of questions you want to ask yourself, to not only increase your chances of finding a buffer overflow, but to greatly reduce your time during your vulnerability discovery. Looking for software vulnerabilities can be done many ways like: fuzzing, source code analysis, and binary analysis just to name a few. This article will focus on the fuzzing technique used to discover the vulnerability triggered in BigAnt software that will lead us to a buffer overflow.
What is Fuzzing?
Wikipedia defines fuzzing as a software testing technique that provides invalid, unexpected, or random data to the inputs of a program. If the program fails (for example, by crashing or failing built-in code assertions), the defects can be noted.
Before we begin to fuzz our target BigAnt Server for vulnerabilities, we need to understand how the program works. Understanding how the target works allows us to focus on what we believe, as the tester, will yield higher results than just blindly throwing random data. The first thing we want to do is identify what network port the Server/Client uses to communicate. A quick inspection would tell us that the server uses port 6660 to listen for an incoming TCP connection from our client. How do we know what port the client connects to the sever? Where did you get port 6660?
This can be done a few ways. The simplest would be to notice when we install the server, the QuickStart Guide asks us to put in our "Company Name:" and also select the "Port:" to use for our server (which defaults to 6660).

If you're like me and you just click next a bunch of times quickly when installing software, you might of missed that detail! The other way would be to look at the server options in the general settings tab, or to go to the advanced settings tab and click on the service manager button. Generally speaking (not always), network software will allow the user to specify what port the application works on, in case the user already has existing software running on that port. This will be in the initial setup, or somewhere in the program that allows us to configure that option.
The other way of finding out what port the client connects to the server would be to simply capture a TCP dump.
To do this we will need to set up two test machines or setup one machine (for both the client and software). If you use one test machine, you will have to setup the loopback interface to in your sniffer to capture data. The option to use one or two systems to setup the capture is up to the user and their resources. If you are not familiar with capturing data, or using a sniffer, the two system setup might be easier for you. The rest of the demonstration is based on using two machines.
We will begin by setting up our server on one machine, and adding a user to the database. For the demonstration, a user named test and the password set as test was created. This will allow us to login from our client machine to the server and monitor the authentication and connection stage.
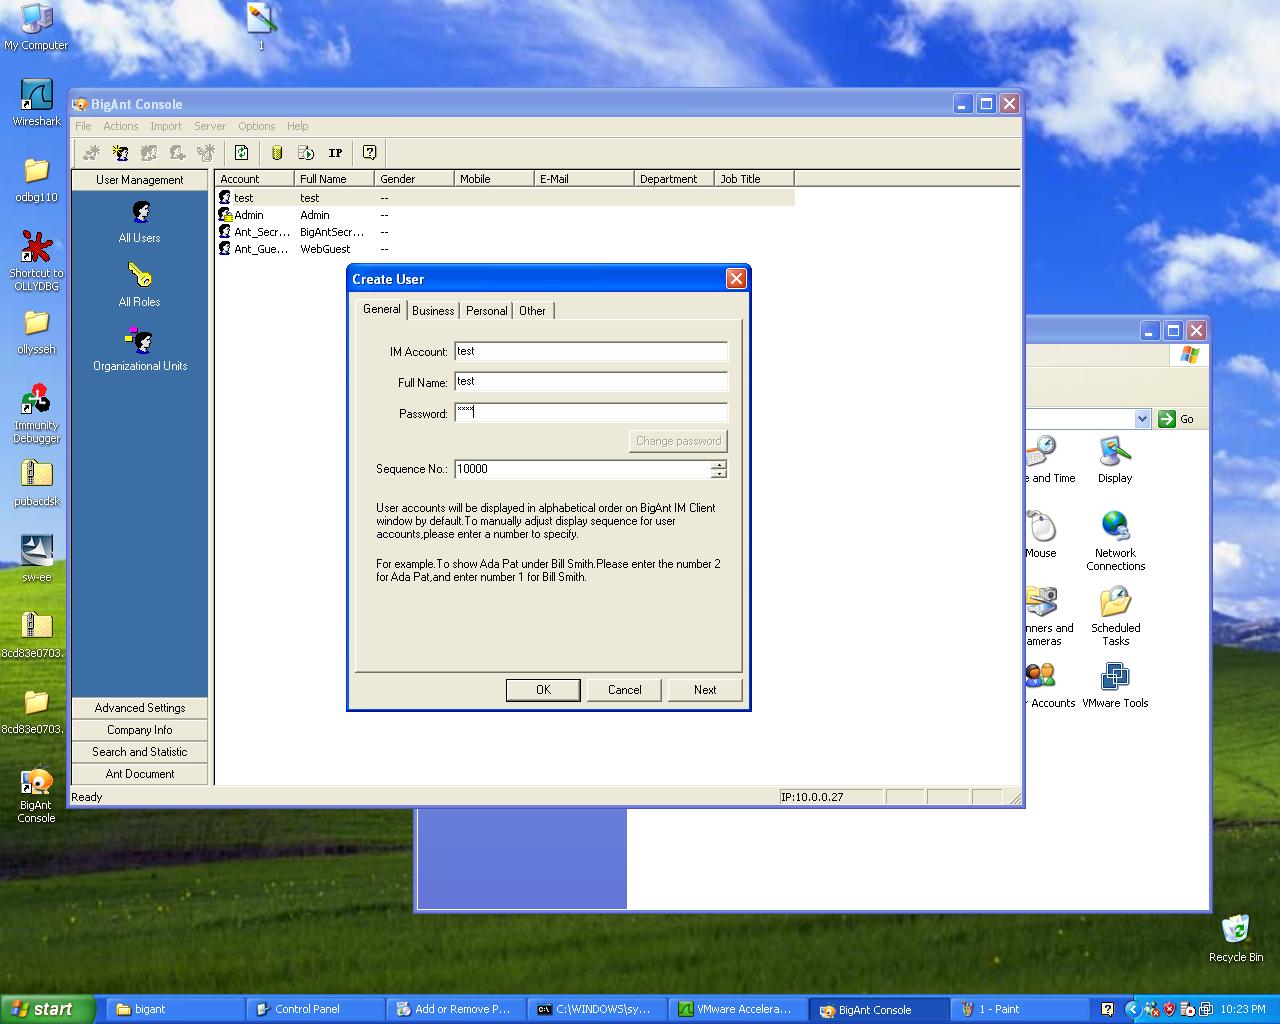
After our user is created on the server, we will go ahead and install the client application on our other machine.

Before connecting to the server, we will want to monitor the packets being sent back and forth. This will provide us with intelligent fuzz variables to put in our fuzzer. To do this, we can use Wireshark on either the client or server to capture the packets and analyze the traffic. Wireshark comes pre-installed if you are using BackTrack, simply type in Wireshark at the console. Please note if you opt to use Wireshark in BackTrack to capture traffic between the server and client, the network interface in BackTrack must be on the same subnet.
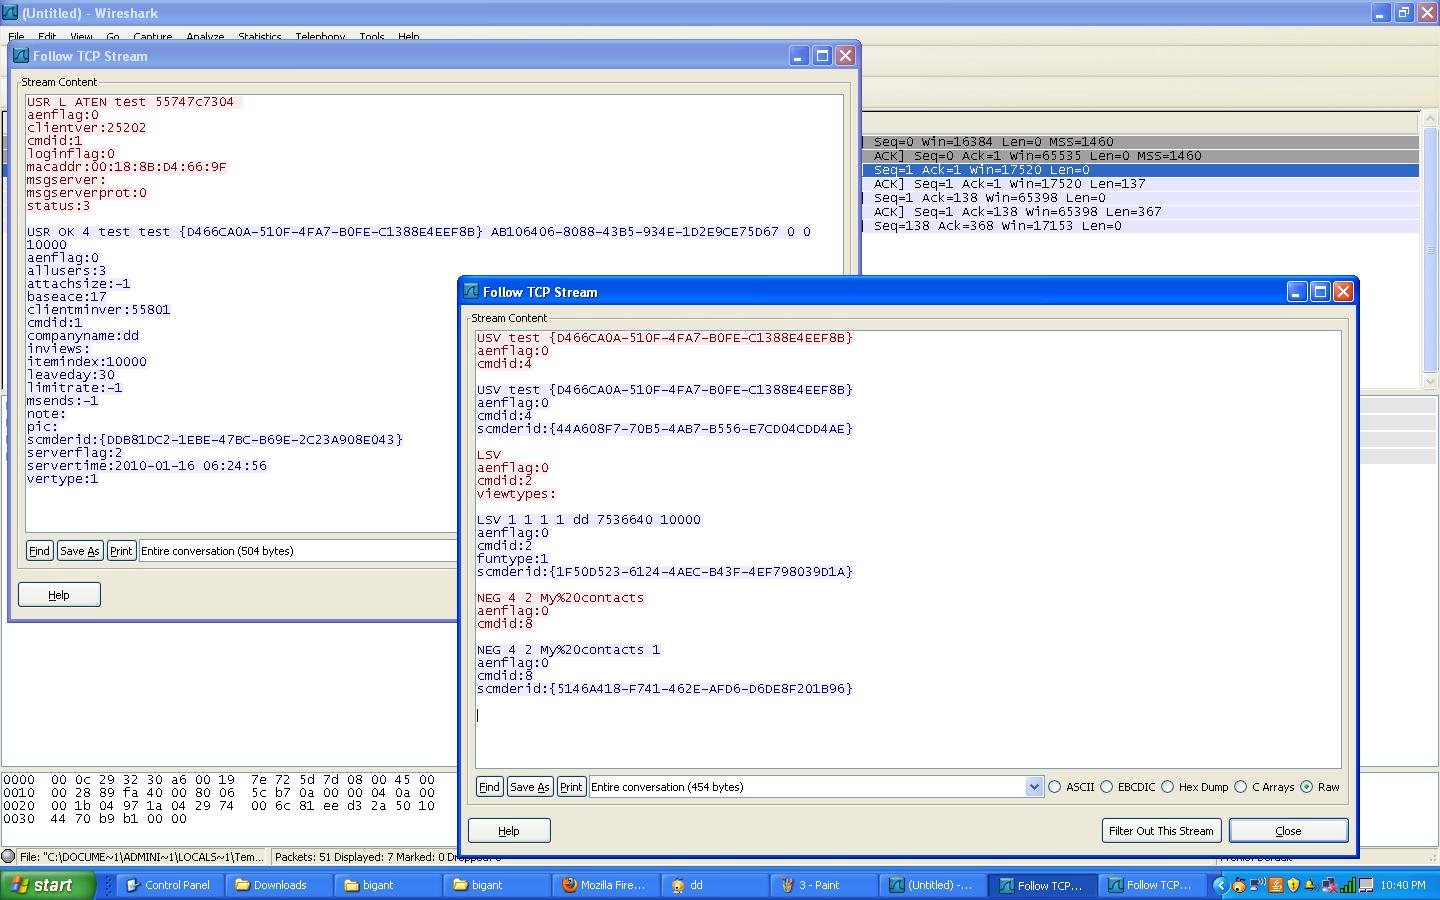
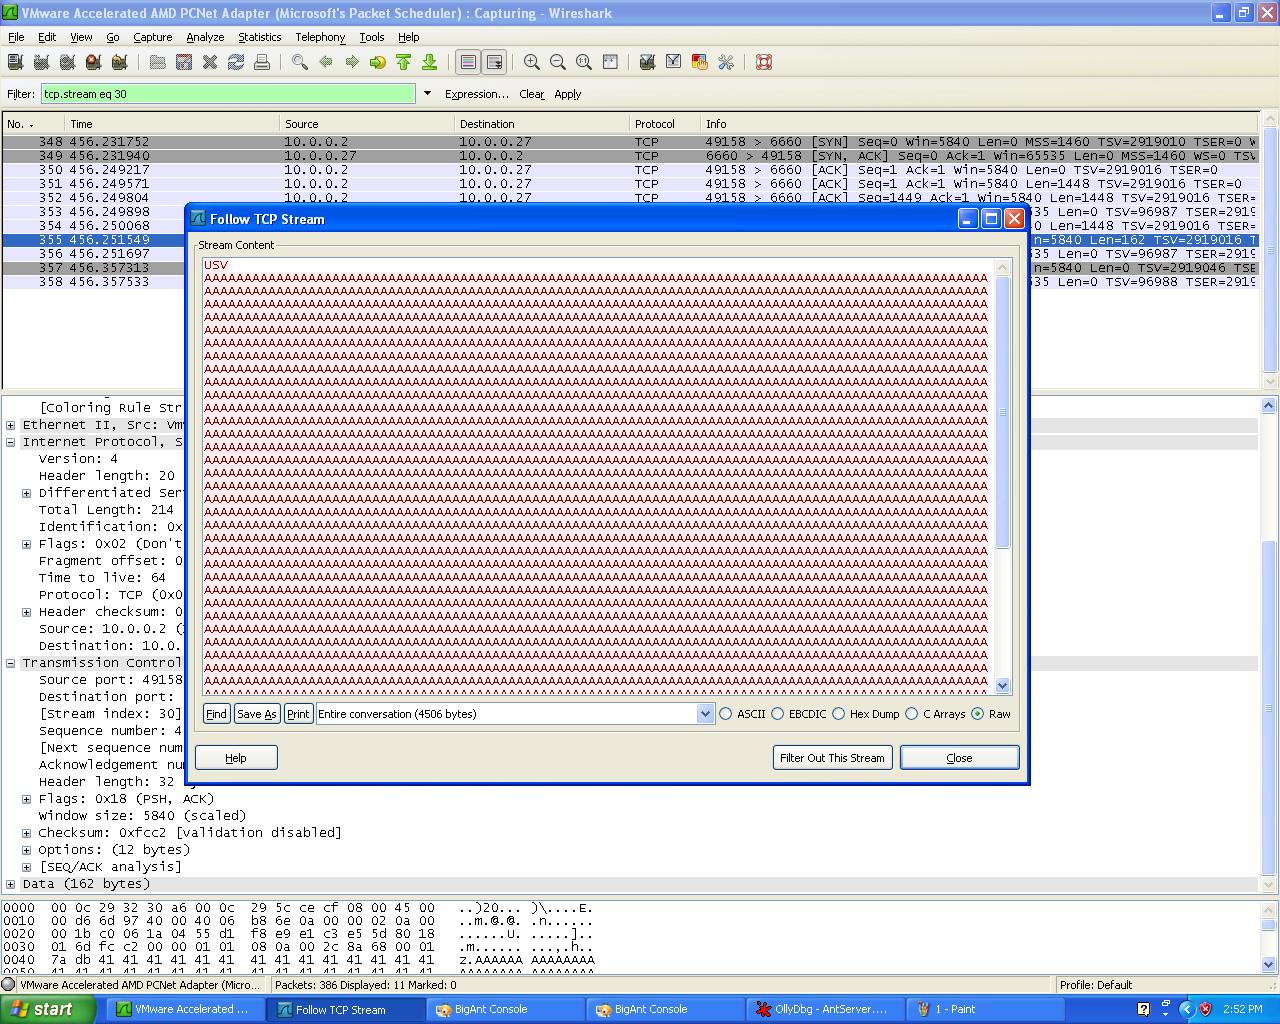
Once the client connects to the server, we can view the TCP dump in Wireshark by selecting a packet with a destination to our server/port and clicking the analyze drop down menu and then selecting 'Follow TCP Stream'. This will allow us to examine the packets in detail exchanged during the authentication stage.
We can see that there appears to be four steps that the client uses to authenticate with the server.
1. First the client sends over "USR L ATEN" followed by the login and password. The server replies back with an OK and assigns the client an ID tag that is used with the next stage in authentication.
2. Next the client sends another packet with "USV" followed by the login, and then the ID tag assigned by the server in the previous packet. The server acknowledges with a reply.
3. The client then sends over a "LSV" packet with additional variables. The server acknowledges.
4. Lastly the client sends over "NEG 4 2 My%20contacts" which is the contacts in the client application, and the server acknowledges.
There's one thing to point out before we go any further. Only the headers of each packet, (ex: USR, USV, LSV, NEG) were used for fuzz testing for this demonstration. It would be equally as important to fuzz the other fields in the packets (such as: aenflag, clientver:, cmdid, etc). Those fields might yield results as well, and should not be dismissed.
Using the above fields, we are going to create a fuzzer that will send over our modified packets with those headers, appended by long strings of data. To do this we first need to build our fuzzer.
Simple Fuzzer by Aaron Conole is a very easy and robust fuzzer that will allow us to fuzz our application. The application can be downloaded from that site and installed on our attacking machine. There is also a video on Security Tube by Vivek Ramachandran demonstrating how this fuzzer works, as well as a couple examples.
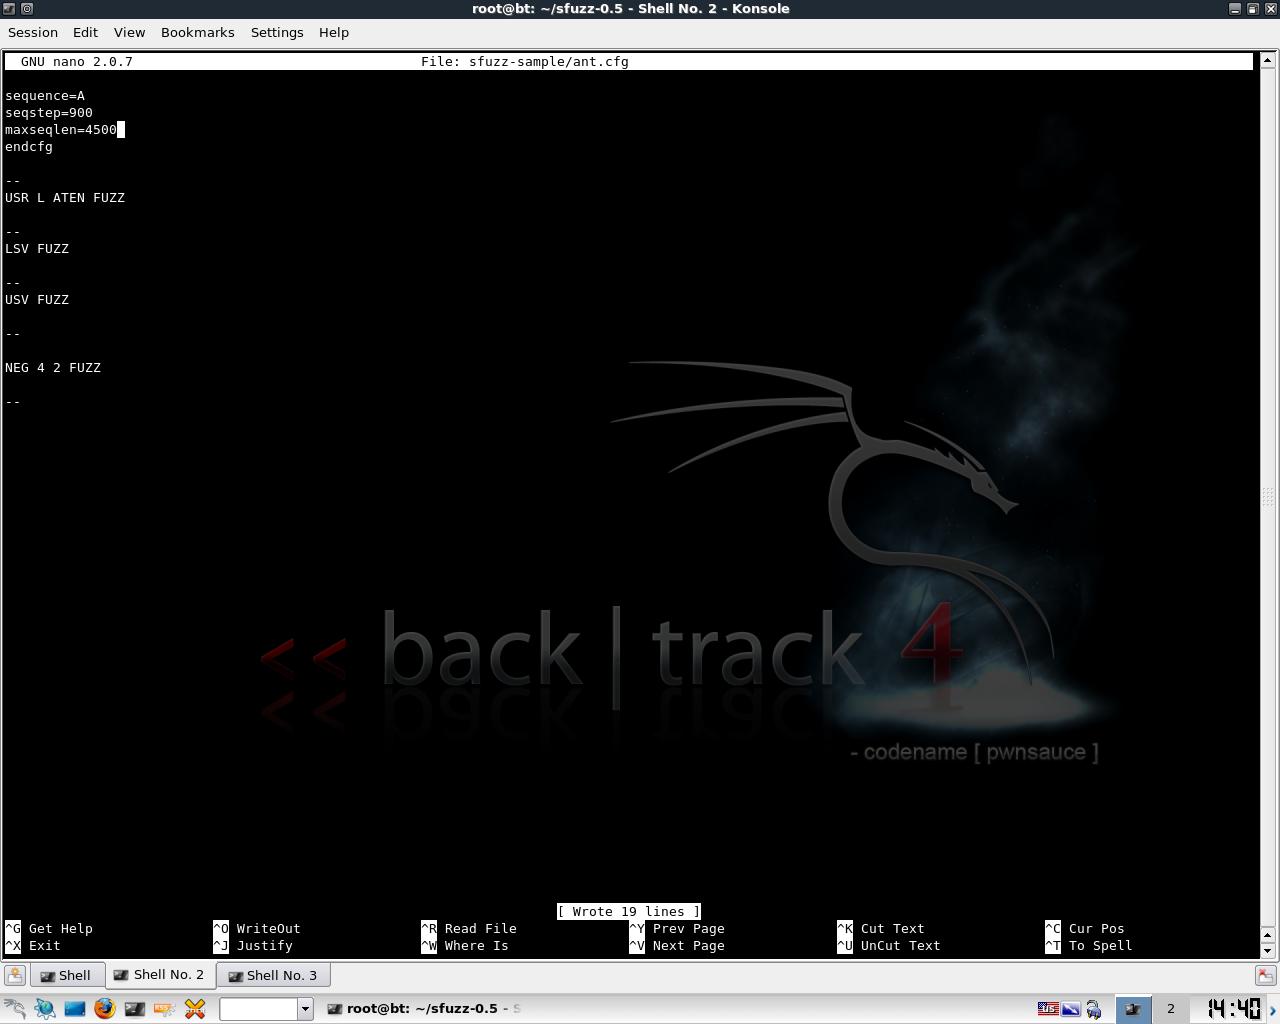
We will go ahead and input our 4 fuzz variables into our fuzzer configuration file named ant.cfg.
The configuration file will send a long sequence of A characters to our server. The next two commands determine the sequence step and max sequence length. The configuration file specifies to send over our A character in 900 byte steps until it reaches a total of 4500. The fuzzed data being sent over will look like:
Start with top command
"command " + "A" * 900
"command " + "A" * 1800
"command " + "A" * 2700
"command " + "A" * 3600
"command " + "A" * 4500
Stop
Repeat next command until program finishes or the application no longer responds
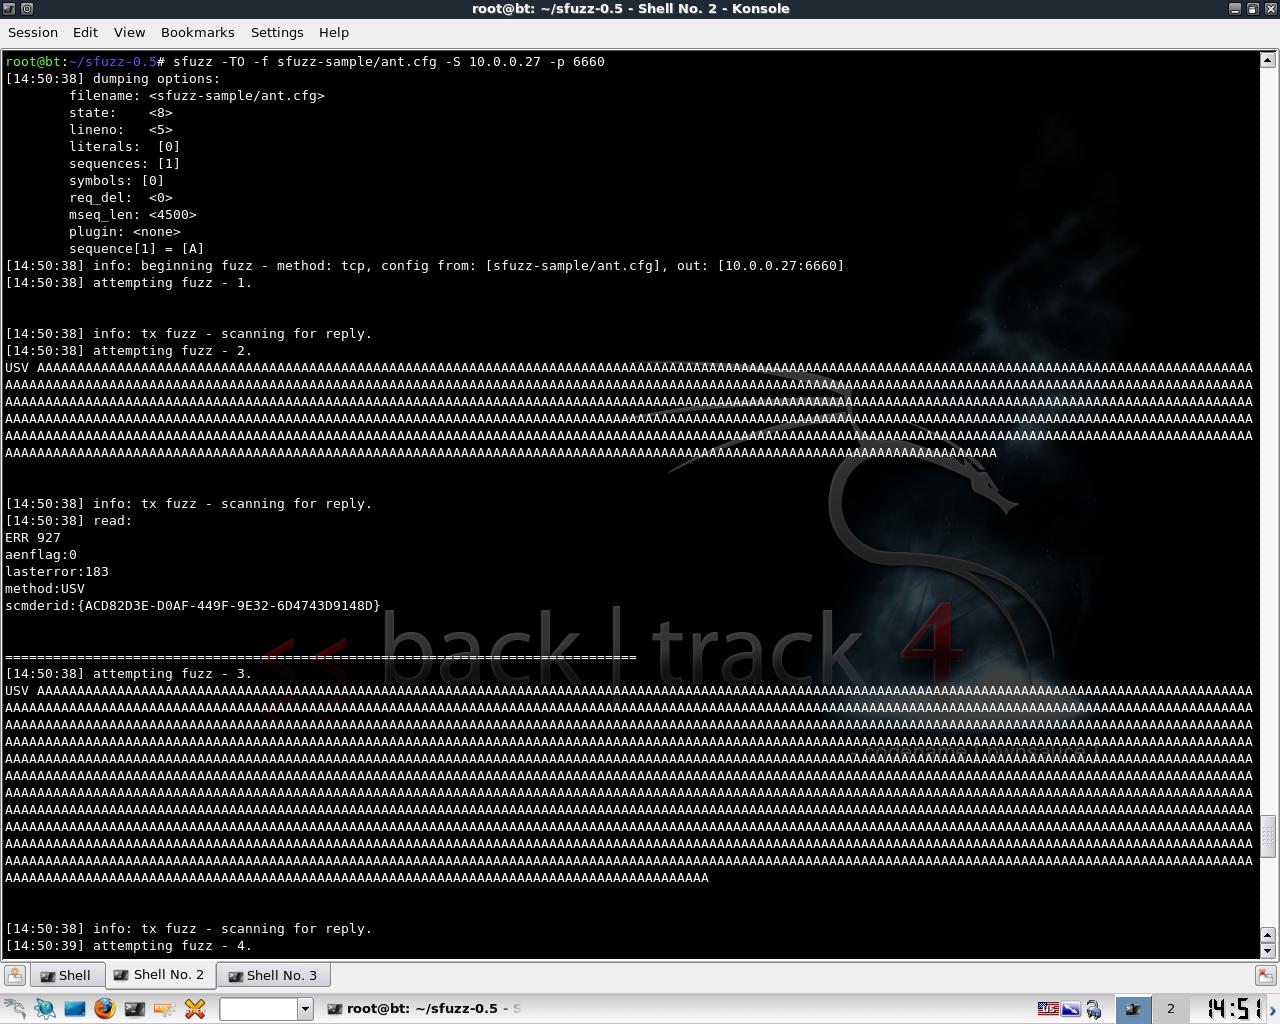
For this demonstration, the picture above only shows the USV string being fuzzed, since that is the command that leads to our buffer overflow. If you skipped watching the video on Security Tube about Simple Fuzzer, and are wondering how to start the application, the command line syntax is:
./sfuzz -TO -f sfuzz-sample/ant.cfg -S 10.0.0.27 -p 6660
Monitoring the crash can be done several ways. The easiest is to see the last packet the server accepted with Wireshark. Since our goal is to send malformed packets to our server and crash the application, the port will then close when it reaches our specially crafted USV packet of more than 1000 "A" characters. It's a good idea to re-test this a few times to confirm that indeed our USV packet causes the crash, and then the next step would be to attach a debugger.

To reaffirm that the USV packet crashes the application, we can attach a debugger like Ollydbg and rerun our fuzzer to confirm that we have indeed found a crash that could potentially lead to a buffer overflow exploit. Now to continue onto Lupin's SEH Stack Based Windows Buffer Overflow for a very in-depth and detailed look on creating a buffer overflow exploit with this server.
One last thing I would like to comment is that while everything looked very cut and dry, fuzzing can take a lot of time, and often doesn't yield the results above. Not all programs are exploitable, and contain improper bounds checks such as the USV field in BigAnt Server. This issue has been corrected, and a vendor patch can be applied to prevent this attack.
References:
http://en.wikipedia.org/wiki/Fuzzing
http://wiki.wireshark.org/CaptureSetup/Loopback
http://www.wireshark.org/
http://www.backtrack-linux.org/
http://aconole.brad-x.com/programs/sfuzz.html
http://securitytube.net/Sfuzz-Fuzzer-Demo-video.aspx
http://www.ollydbg.de/
/2010/01/seh-stack-based-windows-buffer-overflow.html